
Onboarding
Welcome to the ARC Software team! We’re excited to have you on board and looking forward to working with you. It’ll be fun getting to know eachother and work together to accomplish great things.
As you settle in, relax and don’t hesitate to reach out to the team if you have any questions or need assistance. It is always good to ask questions. We are here to support you every step of the way. This is true for junior members, such as co-op students, but also true for those with more experience–our field is always changing, and we’re often on the bleeding edge due to the nature of our work, so we’re all junior in some area from time.
This guide is intended to introduce you to the team’s professional and development environment and is based on contributions by many of our members. It is a living document, so make note of any needed additions or updates–and such a submission would be a good way to start familiarizing yourself with our development workflows, not to mention a great first contribution to the team.
By the end of this onboarding guide, you will have:
- Set up the relevant accounts, your workstation and your development environment.
- A preliminary understanding of the team’s Git workflow.
- An understanding of our software development practices.
1. Get to know the ARCsoft website
Since you are reading this, you are already on your way! We use this website to collect and share our knowledge and experience, and it’s the foundational resource for the team’s work. All team members are expected to contribute regularly.
The main areas are:
- Projects: A brief description of some of our projects. This is pretty much always out of date.
- Docs: Documentation we maintain on our practices and other reference material that stands on its own and that’s not particularly time-bound.
- Log: Periodic articles by team members on problems, solutions, experiences, new technologies, and other notes from our journey.
- What we do and Who we are: About the team.
Key documents and articles to read early on include the following. Don’t worry about memorizing everything; it’s enough to have a general understanding and know where to come back to for reference.
The following will help you gain insight into the mission and identity of the team:
- The last few months or so of log articles
- Anything in the articles that interest you
- What we do and Who we are
2. Always have your machine running the VPN while working
Open the Cisco Secure Client from your Applications or the menu bar. If the connection field is empty, enter vpn.uvic.ca. Ensure you select “2 - Employee Dept Network”. Once you have successfully logged in and the MFA is completed, it should say “connected”, and a lock icon should appear on the app’s icon on the menu bar.
The VPN being ON helps to protect our data from someone sniffing around. Turning the VPN on is something you will do every day, right in the morning as soon as you start your laptop.
3. Set up your Microsoft Teams and Slack account
Open Microsoft Teams and authenticate using your UVic credentials. Teams is the primary collaboration tool we use with our research clients. Once there, send a direct message to Drew so he can see you (students are covered under a separate privacy policy than staff and are not visible to staff until they have initiated contact). Drew will add you to the relevant groups.
Drew will also request a guest account on Slack for you. Slack is the primary collaboration tool within our team and allows those of us with regular accounts to liaise with the rest of RCS as well as our colleagues at other research sites across Canada.
4. Create an SSH keypair
In a terminal window, create an SSH public/private keypair. You’ll be using this to log in to your VM as well as to authenticate to GitLab and potentially other resources.
$ ssh-keygen -t ed25519
Always use a passphrase unless you have a very good reason not to and you understand the risks. Using a passphrase makes an SSH key a two-factor method: authentication requires something you have (the key) and something you know (the passphrase), both useless without the other.
Once created, you can view the public key with:
$ cat ~/.ssh/id_ed25519.pub
ssh-ed25519 AAAAC3NzaC1lZDI1NTE5AAAAIEq+C4Bur8YojMazSUbAJawK8EoQuQWZKnq08nPLfb6n you@machine
Send Drew your public key so he can set up your VM. As for the private key, keep it to yourself, now and for always.
SSH keys are cryptographic key pairs used for secure communication between a client (your computer) and a remote server. You’ll be using this SSH key everytime you need to start your development process.
5. Create an account on GitLab
You will be invited to join the ARCsoft group on GitLab.com via your UVic e-mail. Respond to the invitation and create your account, or link your UVic identity to an existing account if you have one already.
It is encouraged, but not required, to create an avatar.
Enable SSH access to GitLab
Add your SSH public key to your account:
- Click on your profile picture on the top right corner. Select Preferences.
- Under User Settings column on the left of the screen, select SSH Keys.
- Paste your public key above to the Key text area. Set Title to something useful. Optionally, set an expiration date. Then select Add Key.
Test you can use this key to access GitLab.com by running ssh git@gitlab.com. You might see something like:
$ ssh git@gitlab.com
The authenticity of host 'gitlab.com (172.65.251.78)' can't be established.
ED25519 key fingerprint is SHA256:eUXGGm1YGsMAS7vkcx6JOJdOGHPem5gQp4taiCfCLB8.
No matching host key fingerprint found in DNS.
This key is not known by any other names.
Are you sure you want to continue connecting (yes/no/[fingerprint])?
This means this host (your laptop) has never connected to this server before, and is asking you to confirm this is legitimate. If the fingerprint you see matches the above, go ahead and say yes:
...
Are you sure you want to continue connecting (yes/no/[fingerprint])? yes
Warning: Permanently added 'gitlab.com' (ED25519) to the list of known hosts.
PTY allocation request failed on channel 0
Welcome to GitLab, @dleske!
Connection to gitlab.com closed.
(I don’t recall what the PTY allocation request failed on channel 0 message
means, but it’s unimportant here.)
The “Welcome” message indicates the SSH connection and authentication were successful and GitLab.com recognizes you this way, so you can use Git over SSH to work with our code repositories.
GitLab is where our entire codebase is housed, and what we have deeply integrated into our development workflow.
6. Set up VS Code
Visit the Visual Studio Code setup overview to get started with installing VSCode.
VS Code is the IDE typically used by most of our team members, and is very common. If you don’t have a preference for a particular IDE (or to not use one at all), then VS Code is recommended. If you have another preference, you may skip this section.
Once installed, launch the application and make your way through the preferences. Customize how you like, but watch out for the following:
- Turn off automatic code formatting for now–or configure to use our standards (four-space indentation for Python, two-space indentation for HTML, etc.)
- All files should be saved with Unix mode permissions (should be moot now that we’re not using Windows machines)
Formatting
Always save files in UNIX mode. You can check which format you’re using by looking at the bottom right corner of VS Code, where it shows either ‘LF’ or ‘CRLF’:

Unix/Linux/MacOS use a Line Feed (
\n), while Windows uses a Carriage Return + Line Feed (\r\n). The extra character is unnecessary and a bit messy, but can also interfere with code reviews by showing meaningless differences, so we set it to ‘LF’ to ensure code consistency and avoid these issues.
To set Default Line Ending to LF:
- Click on the settings icon at the bottom left corner of the page →
(
 )
) - Go to Settings.
- In the Search settings bar, type: eol.
- Choose \n (Line Feed) as the default end-of-line character.
To turn off automatic formatting:
- Open Settings (⌘ + ,).
- Search for format on save.
- Uncheck the box for Editor: Format On Save
Code on the VM using VS Code
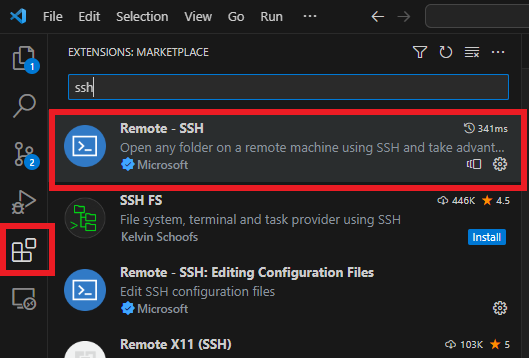
You will use VS Code’s Remote-SSH functionality. This allows you to edit files on the VM as if they were stored locally on your Mac. Click the extensions icon in the side-bar (shown below). Search ssh and the Remote-SSH extension should pop up. Click Install.
On macOS, your SSH keys are stored in ~/.ssh/ by default, and VS Code knows
how to find them. To configure your SSH Host:
- In the bottom-left corner of VS Code, click the Open a Remote Window icon (looks like ><).
- Select “Connect to Host…” and then “Add New SSH Host….”
- Enter the connection command:
ssh <yourVMusername>@<yourVMhostname>. - When prompted to select a configuration file to update, choose
/Users/<yourname>/.ssh/config.
To use Git commands on the VM using the SSH key stored on your Mac, you must enable Agent Forwarding.
By default, the SSH Agent forgets your keys after a reboot. We use the Apple
Keychain to store your passphrase so the agent can load it automatically. Run
this in the Mac terminal (replace id_ed25519 with actual key name):
ssh-add --apple-use-keychain ~/.ssh/id_ed25519
Next, we will update your SSH configuration file. This modification will tell your Mac to automatically use your saved credentials when you connect. It also sets up a bridge that lets the VM safely use your Mac’s security key to talk to GitLab.
While you can add these settings to a default stanza (using Host *) to apply
them to every SSH connection you make, we will add them specifically to your
VM host entry for now. Open your configuration file by running code ~/.ssh/config in your terminal. Locate the block starting with Host <yourVMhostname>. Update the block so it matches the structure below:
Host <yourVMhostname>
  Hostname <yourVMIPAddress>
  User <yourVMusername>
  ForwardAgent yes
  AddKeysToAgent yes
  UseKeychain yes
Once you have saved the file and connected to the VM, you must verify that your Mac’s identity is being shared correctly. Inside the VM terminal, run:
echo $SSH_AUTH_SOCK
If you see a file path (e.g., /tmp/ssh-XXXX/agent.123), your agent is
forwarding correctly. You can now verify your GitLab access by running:
ssh -T git@gitlab.com
If successful, you will see: “Welcome to GitLab, @yourusername!”. (If you see “@gitlab.com: Permission denied”, it’s that you forgot to use the username “git” in the above, so SSH assumed your local identity.)
If the output for echo $SSH_AUTH_SOCK is blank, the SSH agent is not being
forwarded. This is usually caused by a typo in your ~/.ssh/config file or
because the SSH agent isn’t running on your Mac. Double-check that
“ForwardAgent yes” is present in your config, then restart VS Code and try
again. Do not attempt to use Git commands until this is resolved.
Setting up SSH for VS Code allows us to use VS Code’s native Source Control features and also access files on our VM directly from VS Code.
7. Our Git Workflow
- You clone a project or repository.
- Create your own separate branch (in GitLab or in your terminal) with a name
like
i<issue-number>-very-brief-description, where the brief description is one to three words summarizing the issue. For example:i135-map-bleed-bugfix. - Work on the branch and make sure to commit regularly.
- Once you’re satisfied with your work, ensure that your branch is the same as the main branch except for your new changes by rebasing it with the main branch.
- Finally, push your branch and create a merge request. Give the MR a brief but meaningful name, such as “Fix map bleed”.
- Assign the next most junior team member as reviewer.
- Once reviewed, resolve any comments, if necessary, and pass back to the reviewer. When they are satisfied, they will assign the next reviewer and the cycle repeats.
- Once Drew has done the final review he will merge the branch into the main branch.
This workflow is described more fully in our document on issue and MR workflows.
To learn or refresh your Git skills, follow these blogs:
8. What to expect your first few weeks
As you approach readiness to work on projects, take the time to thoroughly familiarize yourself with the codebase, project documentation, and the relevant technologies employed. The technologies used will depend on the project you will be working on, so make sure to check with the team.
If you are comfortable, consider writing a brief biography for the ARCsoft website to foster personal connections within the team. You can share some information about your background, interests, and hobbies.
Maintain open communication with the team through the daily stand-up meetings on Teams or via the channel on Slack, to discuss your progress or challenges within the project.
9. Final Thoughts
“Success is no accident. It is hard work, perseverance, learning, studying, sacrifice and most of all, love of what you are doing or learning to do.”
— Pele, Brazilian soccer player
The path to success often conceals an ongoing, concerted effort and unwavering dedication of the team.
Together, let’s commit to work hard and grow as a cohesive unit.