
Using SSH with Visual Studio Code
We use virtual machines a lot and many people like coding in VS Code, but some may have never used VS Code to code on another machine before. This post is a tutorial for setting up SSH in VS Code so that you can edit files on another machine right in VS Code.
Prerequsites
If you’ve already set up WSL, generated an SSH key on that Local Linux VM and the corresponding public key has been added (by Drew) to your remote development VM, then you’re ready for this tutorial. If not, see Archie’s tutorial on setting up SSH keys.
Overview
We want to use VS Code for editing files on our remote development VM. Now that we have an ssh key for that VM we will need to:
- Copy our key to the local Windows system.
- Install the Remote-SSH extension in VS Code.
- Configure VS Code to look for our remote VM.
1. Copy SSH key to Windows
Login to your local VM and in your home directory run:
$ explorer.exe .
Note: The . at the end is important, telling Explorer to open in your current directory.
In Explorer, ensure hidden folders are displayed if you can’t see the .ssh folder. To display hidden folders navigate to the View tab and then check the box on the right of the menu to display hidden items.
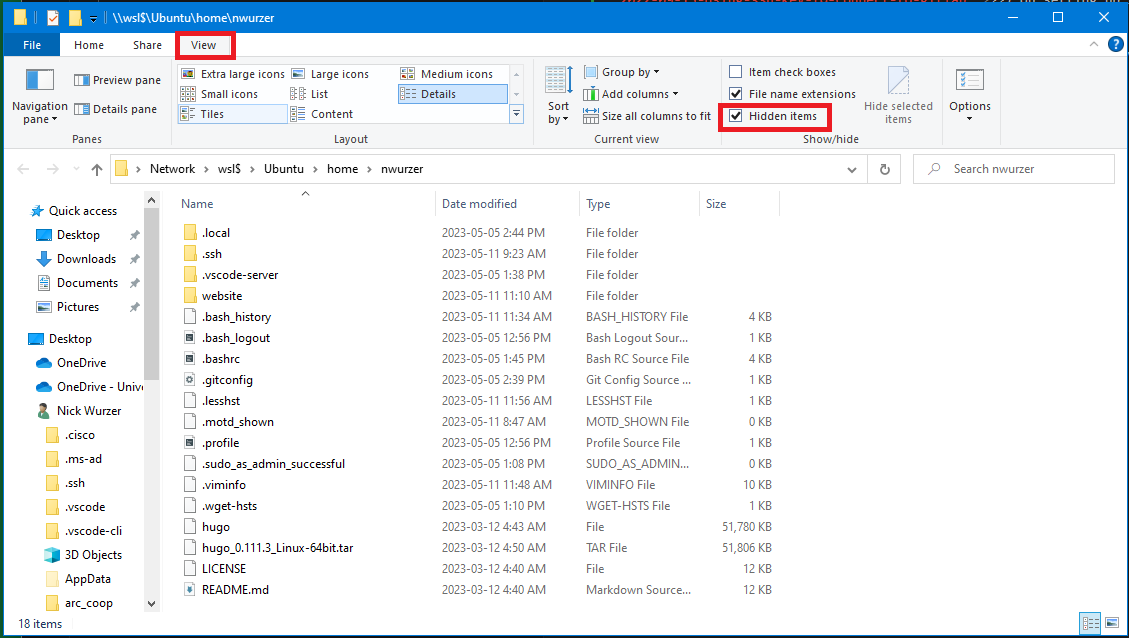
Next, copy the folder and paste it to your Windows home directory so that VS Code will have access to it.
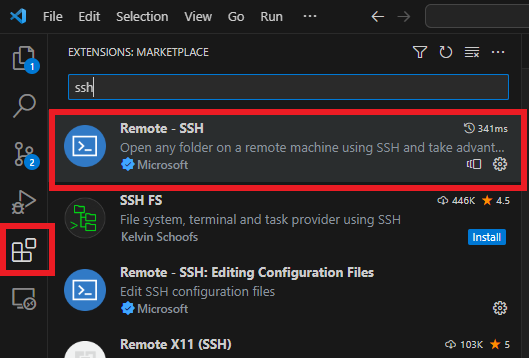
2. Install Remote-SSH Extension
Open VS Code and click the extensions icon in the side-bar (shown below). Search ssh and the Remote-SSH extension should pop up. Click Install.
3. Add VM to VS Code
All that’s left is adding your remote host to a config file and then signing in.
In the very bottom-left of VS Code there is an icon that looks similar to
><. Click the icon, then click Connect to Host in the menu that pops up.
Click the button to add a new SSH host. Enter
<yourVMusername@yourVMhostname> in the textbox.
You should now have everything set up to log into your VM with VS Code. Click the bottom-left icon again to connect. Click on the VM you just configured. Enter your SSH key’s password when prompted. You should now be in your VM! Open a terminal in VS Code by clicking Terminal in the top left main menu. You should see your remote host in the terminal window indicating that you’ve logged in. You can use the file Explorer in VS Code to open and edit any file in your VM.
Bonus
If you want to be able to code on your local Linux VM with VS Code then install the WSL extension for VS Code following the same procedure as in step 2. Next configure VS Code so it sees your VM and log in using a similar process as step 3.
Caveat
Also note that we set up SSH for VS Code, but not the SSH-Agent so VS Code cannot talk to git. A work around, is you can log in to your remote machine via local Linux VM and use that terminal for git commands.